জিমেইলে সিগনেচার এড করুন: মোবাইল ও কম্পিউটার দিয়ে
ইমেইল যোগাযোগের ক্ষেত্রে সিগনেচার একটি গুরুত্বপূর্ণ অংশ। এটি আপনার ব্যক্তিগত বা পেশাগত পরিচয় বহন করে। জিমেইল ব্যবহারকারীরা সহজেই তাদের ইমেইলে স্বয়ংক্রিয় সিগনেচার যোগ করতে পারেন। সিগনেচার সেট আপ করা আপনার প্রোফেশনালিজম এবং ব্র্যান্ডকে তুলে ধরে, যা আপনার ইমেইল গ্রহণকারীকে একটি পেশাদার অনুভূতি দেয়।
এই ব্লগে আমরা আলোচনা করবো কিভাবে মোবাইল এবং কম্পিউটার দিয়ে জিমেইলে সিগনেচার এড করুন এবং এটি কতটা সহজ একটি প্রক্রিয়া।
কেন সিগনেচার ব্যবহার করবেন?
সিগনেচার আপনাকে প্রতিটি ইমেইলে একটি স্বয়ংক্রিয় পরিচয় প্রদান করতে সাহায্য করে। পেশাদার ইমেইল সিগনেচার সাধারণত নাম, পদবি, ফোন নম্বর, কোম্পানির নাম এবং লোগো ধারণ করে। এটি আপনার ব্যবসায়িক পরিচিতি তৈরি করে এবং আপনার যোগাযোগকে আরও পেশাদার করে তোলে।
কম্পিউটার দিয়ে জিমেইলে সিগনেচার এড করুন
আপনি যদি কম্পিউটারে জিমেইলে সিগনেচার এড করতে চান, তাহলে নিম্নলিখিত ধাপগুলো অনুসরণ করুন:
- জিমেইলে লগইন করুন: প্রথমে আপনার জিমেইল অ্যাকাউন্টে সাইন ইন করুন।
- সেটিংস মেনুতে যান: উপরে ডানদিকে থাকা গিয়ার আইকনে (⚙️) ক্লিক করুন। তারপর “See all settings” অপশনে ক্লিক করুন।
- General ট্যাব নির্বাচন করুন: সেটিংস পেজ খোলার পর “General” ট্যাবে যান। এই ট্যাবে স্ক্রল করলে “Signature” নামে একটি অপশন দেখতে পাবেন।
- Signature তৈরি করুন: “Create New” বাটনে ক্লিক করুন এবং আপনার সিগনেচারের জন্য একটি নাম দিন। তারপর আপনার সিগনেচারের জন্য একটি টেক্সট বক্স পাবেন যেখানে আপনার নাম, পদবি, ফোন নম্বর, ইমেল ঠিকানা এবং অন্যান্য প্রাসঙ্গিক তথ্য লিখুন। আপনি আপনার সিগনেচারে লিঙ্ক বা ছবি (যেমন লোগো) যোগ করতে পারেন।
- ডিফল্ট সিগনেচার সেট করুন: একই পৃষ্ঠায়, আপনি চাইলে নির্দিষ্ট ইমেইলগুলোতে সিগনেচার স্বয়ংক্রিয়ভাবে যোগ হবে কিনা তা নির্বাচন করতে পারবেন। আপনি চাইলে সব ধরনের ইমেইল (নতুন ইমেইল এবং রিপ্লাই/ফরোয়ার্ড করা ইমেইল) এ আলাদা সিগনেচারও সেট করতে পারেন।
- পরিবর্তনগুলি সংরক্ষণ করুন: একবার আপনার সিগনেচার লেখা হয়ে গেলে, নিচের দিকে স্ক্রল করে “Save Changes” বাটনে ক্লিক করুন।
এখন থেকে আপনি যখনই একটি নতুন ইমেইল পাঠাবেন, আপনার নির্ধারিত সিগনেচারটি স্বয়ংক্রিয়ভাবে যোগ হবে।
মোবাইল দিয়ে জিমেইলে সিগনেচার এড করুন
মোবাইল ব্যবহারকারীরাও খুব সহজেই তাদের জিমেইলে সিগনেচার এড করতে পারেন। মোবাইল অ্যাপের মাধ্যমে সিগনেচার সেট করার জন্য কিছু অতিরিক্ত ধাপ রয়েছে। নিম্নলিখিত ধাপগুলো অনুসরণ করুন:
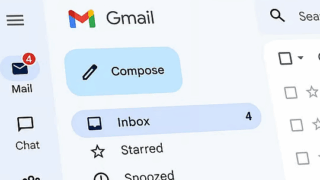
- জিমেইল অ্যাপ খুলুন: আপনার স্মার্টফোনে জিমেইল অ্যাপ খুলুন এবং আপনার অ্যাকাউন্টে লগ ইন করুন।
- সেটিংস মেনুতে যান: উপরে বাম দিকে থাকা তিনটি লাইন (☰) মেনুতে ক্লিক করুন। এরপর নিচের দিকে স্ক্রল করে “Settings” অপশনে ক্লিক করুন।
- অ্যাকাউন্ট নির্বাচন করুন: আপনি যদি একাধিক ইমেইল অ্যাকাউন্ট ব্যবহার করেন, তাহলে সেই নির্দিষ্ট অ্যাকাউন্টটি নির্বাচন করুন যেটাতে আপনি সিগনেচার এড করতে চান।
- Mobile Signature অপশন নির্বাচন করুন: অ্যাকাউন্ট সেটিংসে “Mobile Signature” অপশনটি খুঁজে বের করুন এবং এতে ক্লিক করুন।
- Signature লিখুন: এখানে আপনি আপনার সিগনেচার লিখুন, যেমন আপনার নাম, পদবি বা অন্য কোনো প্রাসঙ্গিক তথ্য। মোবাইল অ্যাপের মাধ্যমে আপনি শুধুমাত্র টেক্সট সিগনেচার যোগ করতে পারবেন, তাই লোগো বা ফর্ম্যাটেড টেক্সট মোবাইল অ্যাপে যোগ করা সম্ভব নয়।
- সংরক্ষণ করুন: সিগনেচার লেখার পর “OK” বাটনে ক্লিক করে এটি সংরক্ষণ করুন।
এবার থেকে আপনি যখনই আপনার মোবাইল থেকে ইমেইল পাঠাবেন, এই সিগনেচারটি স্বয়ংক্রিয়ভাবে যোগ হবে।
সিগনেচারের কিছু টিপস
- পেশাদার লুক বজায় রাখুন: সিগনেচারকে সিম্পল ও পেশাদার রাখুন। খুব বেশি ইমোজি বা ছবি যোগ করার থেকে বিরত থাকুন।
- সোশ্যাল মিডিয়া লিঙ্ক যোগ করুন: আপনার প্রোফেশনাল সোশ্যাল মিডিয়া প্রোফাইলের লিঙ্ক (যেমন, LinkedIn) সিগনেচারে যোগ করতে পারেন।
- সংক্ষিপ্ত ও তথ্যবহুল রাখুন: সিগনেচার বড় বা জটিল হওয়া উচিত নয়। আপনার প্রয়োজনীয় তথ্যগুলো সংক্ষিপ্তভাবে উপস্থাপন করুন।
- রেগুলার আপডেট করুন: আপনার তথ্য পরিবর্তন হলে সিগনেচারও আপডেট করতে ভুলবেন না।
উপসংহার
সিগনেচার একটি সহজ এবং কার্যকর উপায় আপনার ইমেইলের পরিচয় বাড়ানোর জন্য। কম্পিউটার এবং মোবাইল থেকে জিমেইলে সিগনেচার এড করুন খুবই সহজ এবং আপনার ইমেইল যোগাযোগকে আরও পেশাদার করে তুলতে সহায়ক।


